In this guide, we will delve into synchronizing your catalog with AMP. We present two viable options to achieve this smoothly: through integration with your e-commerce platform or using a URL.
In the following sections, we will explain both methods.
Content table
E-commerce Integrations
Synchronize Your Catalog with a URL
1.1. Set Up with URL (Initial Configuration)
1.2. Set Up with FTP or SFTP (Initial Configuration)
2. Scheduling (Updating the Data Import)
3. Field Mapping
4. Create Optimized Feeds
E-commerce Integrations
Within AMP, we offer seamless compatibility with the following e-commerce platforms:
- Shopify
- Vtex
- Magento
- Salesforce
- IBM Webstore (Contact Customer Success)
- SAP (Contact Customer Success)
To proceed, follow the instructions in the respective articles dedicated to each platform. Once completed, return to the Set Up section in this guide to continue with your process.
Synchronize Your Catalog with a URL
If you are not using an e-commerce integration and instead wish to connect your catalog via a URL, take a moment to review some points to ensure a smooth process.
If you are using a Google Spreadsheet, review this article to synchronize your catalog with AMP.
First, verify the required and optional fields for your catalog and industry, and ensure that your catalog file meets the following requirements:
- File Formats: Ensure your catalog is in one of the following formats: XML, CSV, or JSONL. The Feeds data import function works perfectly with these formats.
- Image Formats: Ensure your images are in JPG, JPEG, PNG, SVG, or WEBP format.
To further improve the catalog reading process, review the following points:
- Avoid Using a CDN: If your catalog is hosted on a Content Delivery Network (CDN), it is best to avoid this for this particular upload. Accessing the information directly without going through a CDN will prevent potential interferences with the reading process.
- Add Our User-Agent to the Whitelist: Add "feed-composer/1.0" to your server’s whitelist. This ensures that Feeds can access and read your catalog information smoothly.
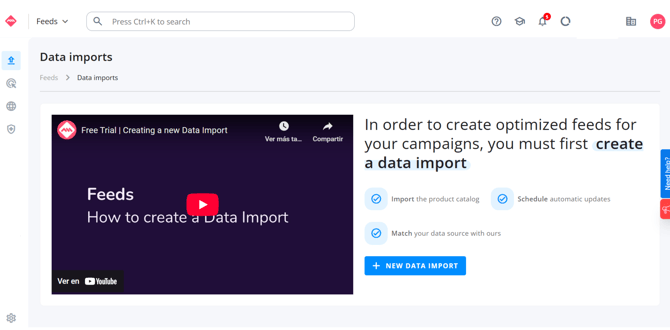
Now that you have reviewed all the requirements, you can upload your catalog to Feeds and create a Data Import.
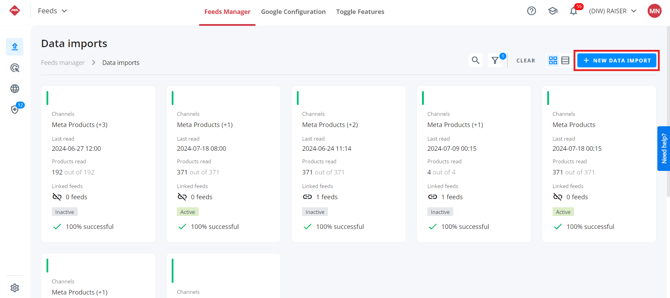
First, go to Feeds Manager, click on Data Imports, and then + New Data Import.
1.1. Set Up with URL (Initial Configuration)
When the Set Up window opens, we will select the option A direct link. This will open the Import products from a direct link page, where we need to define the name of the Data Import and the feed link. We must also specify whether this link is public or private and the encoding type from the available dropdown options (we recommend leaving the option "Auto Detect").
If the feed URL is private, you will also need to fill in the Username and Password fields.
After defining these details, complete the information related to the feed's location, marking the corresponding country, language, and the currency in which the prices are displayed.
Location-related fields are important if you plan to generate an international catalog later, so ensure you fill out this information correctly.
Once all fields are completed, click Next and follow the steps outlined in point 2.

1.2. Set Up with FTP or SFTP (Initial Configuration)
When the Set Up window opens, we will select the option An FTP server. This will open the Import products from an FTP server page, where we need to define the name of the Data Import and these details for your FTP or SFTP: Host, Path, File Name, Port, Username, and Password.
After defining these details, complete the information related to the feed's location, marking the corresponding country, language, and the currency in which the prices are displayed.
Location-related fields are important if you plan to generate an international catalog later, so ensure you fill out this information correctly.
Once all fields are completed, click Next and follow the steps outlined in point 2.

2. Scheduling (Updating the Data Import)
Select the frequency which you want to automatically update the catalog:

For example, if you know your catalog is generated at 8:00 AM in your e-commerce platform, you can schedule it here for 8:30 AM to ensure the catalog content processed in Feeds Manager is updated correctly. You can also choose whether you want this read to occur once a day, month, week, or at custom intervals.
If you want to set up a single upload, you can fill in the fields in the "Manual Update" section.
If needed, you can select the time zone of your catalog to always align with the markets.
Click Next to proceed to the final step: mapping the fields.
3. Field Mapping
When uploading a new catalog, we need to map the information from our e-commerce platform to the fields required by different platforms.
This field configuration ensures that there are no data reading issues across platforms.
First, click on the blue New Field button to start the mapping process:

Next, you will need to name the new field you want to add to the catalog and define the relationship using one of the following three options:

-
Static Value: use this option when you need to create a field with the same value for all products. For example, if you want to add condition = new to the entire catalog:

-
Dynamic Field: use this option to link the new field you are creating to the corresponding field in your e-commerce platform. For example, if you want to create the platform-required field unit_pricing_base_measure and the information is available in your e-commerce under the field unit_price, you should select it from the dynamic field dropdown:

-
Undetected Field: if there is a field available in your data source that AMP has not detected, use this option and enter the exact field name.

Remember! You must fill out at least all the fields marked as "Required". This is essential to save your Data Import.
At the top of the page, you can click on the Preview icon to review how your product fields are configured. In the Before And After section, you will see an example of the transformations applied to prepare your catalog for optimization.
Once everything is reviewed, you can click Finish.
4. Create Optimized Feeds
Once the configuration is complete, the next step will be to create an optimized feed from scratch that will serve to run catalog campaigns on any platform.
In this new feed, we can segment the products and improve your catalog through optimizations to make them more interesting and attractive to potential customers.
Step by Step Tutorial